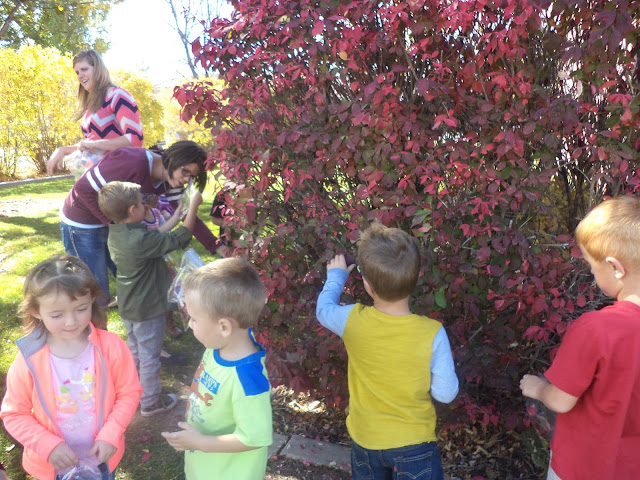
When we learned about Fall and leaves changing, we went for a walk and gathered leaves from trees and bushes. We learned about the many colors that leaves change.
When the children came back in, we had simple tree and bushes outlines in the halls. The children were able to use fall colors to paint any trees and bushes that they wanted. Some children worked individually and some worked collaboratively.
When they were finished, we had created a beautiful fall landscape.
Tuesday, May 31, 2016
Felt Butterflies
After learning about butterflies and talking about how they grow and develop, the children painted their own felt butterflies. The teachers prepped by cutting out the butterfly shapes and attaching a butterfly body to the center and hot gluing on two wiggly eyes.
As children were introduced to the activity, we reviewed the ideas of how a butterfly changes from a caterpillar (like the middle part of the butterfly body) into a butterfly. We also discussed how butterfly wings are all different colors and how they have to "dry" before they can fly.
We placed glitter paints at the table and the children were able to create their very own colorful butterfly.
Sticky Face Collages
To create Sticky Face Collages, draw a circle to represent a face on the non sticky side of contact paper. Peel the backing off the paper and use magnets or tape to place the contact paper on the easel (make sure the sticky side is facing out). Supply buttons, pom poms, pipe cleaners and other materials for the children to use as they create faces. When they finish, gently place a piece of white construction paper to their picture and the contact paper will adhere and they may take their pictures home.
*Idea from Jessica Harrison
Fall Apple Trees
This project was intended to help the children develop cutting and drawing skills. On the day we learned about Apples, we created a tree that hung in the hallway. At circle time we talked about the many different colors of apples and tasted them.
For our art activity, we had cut yellow, red and green paper into 4 inch squares. The children's job was to create apples for the apple tree. The children chose the colors of apples they wanted to make and then drew their apple. After they cut it out, they would get a piece of tape from the teacher and go hang it on the tree. The children worked a long time making more and more apples for the tree.
Monday, December 16, 2013
Colorful Christmas Trees
These trees turned our so adorable. Each child was given a paper that had a brown trunk glued onto it. The teacher wondered how she could make it into a beautiful tree. The children said that it was missing its branches. Fortunately, we had three sizes of colorful branches cut out and ready to use!
We showed the children how we could put the longest ones on the bottom of the tree and then the medium sized ones in the middle, and finally the smallest ones on top.
Friday, November 22, 2013
Turkeys
for this project, each child was given a turkey body to cut out. (We are continually working on cutting skills for our class.) Then they glued on eyes, beak and feet. When that was complete, the teacher stapled a large coffee filter that was folded in half to the turkey.
Wednesday, October 30, 2013
Tear Art Owls
When we learned about owls we made these cute tear art owls. Colored paper (browns, black, white and gray) was cut into strips and put on the tray. Yellow eyes, orange beaks and orange strips for the legs were also on the tray. The children had various pictures of owls to look at.
They drew a white circle on their paper and then got to fill it in with the colors they wanted for their owl. The tore the papers into smaller pieces. Tearing can be a challenge for many children so you will want to watch for those who need extra guidance. The children glued their pieces on and then added eyes and a beak and feet.
Subscribe to:
Posts (Atom)


